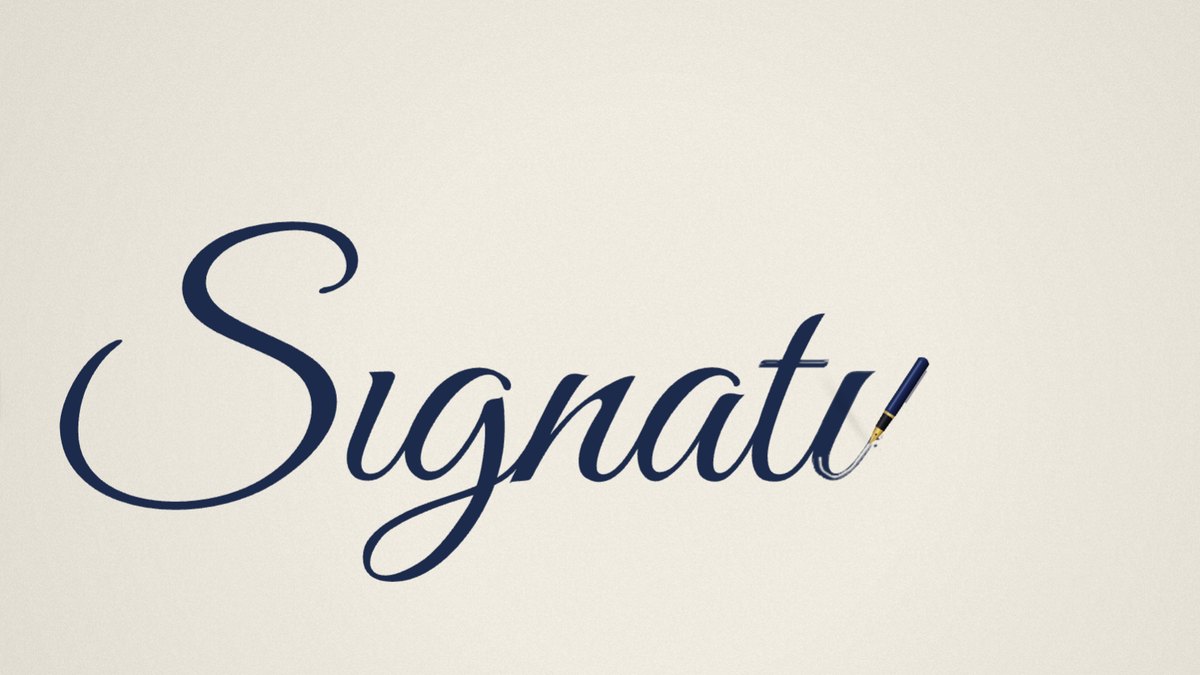
A handwritten logo animation draws your logo on screen line by line, as if someone were writing it with a pen. Designers also call it a logo stroke animation or a write-on. It suits signature logos, script wordmarks and anything hand-lettered, and it's one of the calmest, classiest ways to open or close a video. This guide shows how to make one with our free Signature Animator, with a screenshot of every step. You won't need After Effects, and you won't trace a single stroke by hand.
The short version:
- Open the Signature Animator.
- Upload your logo or a photo of your signature, or type a name.
- Check the strokes and fix the order or direction if you need to.
- Pick the speed, the pen and the edge style.
- Export an MP4 up to 4K, or a GIF. There's no watermark.
What makes a handwritten logo animation look real
Most "handwriting" effects cheat. They slide a mask across finished text, so the letters appear from left to right but never really get written. Loops fill in all at once, the dot of an i turns up with its stem, and a signature looks wiped on rather than signed.
A proper handwritten logo stroke animation follows the centre line of every stroke, in the order a hand would move. That's what motion designers do in After Effects: they trace each stroke with the Pen tool, then animate it with Trim Paths or the Stroke effect. It looks great. It also takes an hour or more per logo, and longer for a long signature.
The Signature Animator finds those centre lines for you. It measures how thick the ink is at each point, joins lines where they cross, puts the strokes in writing order and draws them one after another. Thick downstrokes stay thick and hairlines stay thin, because the tool fills your real shape along each stroke instead of drawing a line of one width.
Step 1: Upload your logo or your signature
Open the Design panel on the left and click Upload logo. You've got three ways in:
- A logo file. SVG gives the cleanest lines. PNG and JPG work too.
- A photo of your signature. Sign on white paper with a dark pen, then take a straight, evenly lit photo and crop it close to the signature. The tool writes it back in your own strokes, not in a font.
- A typed name. Open Type text. No logo needed and pick one of 54 fonts. Connected scripts like Great Vibes, Allura or Mrs Saint Delafield look the most like real handwriting, and you can load your own font file too.
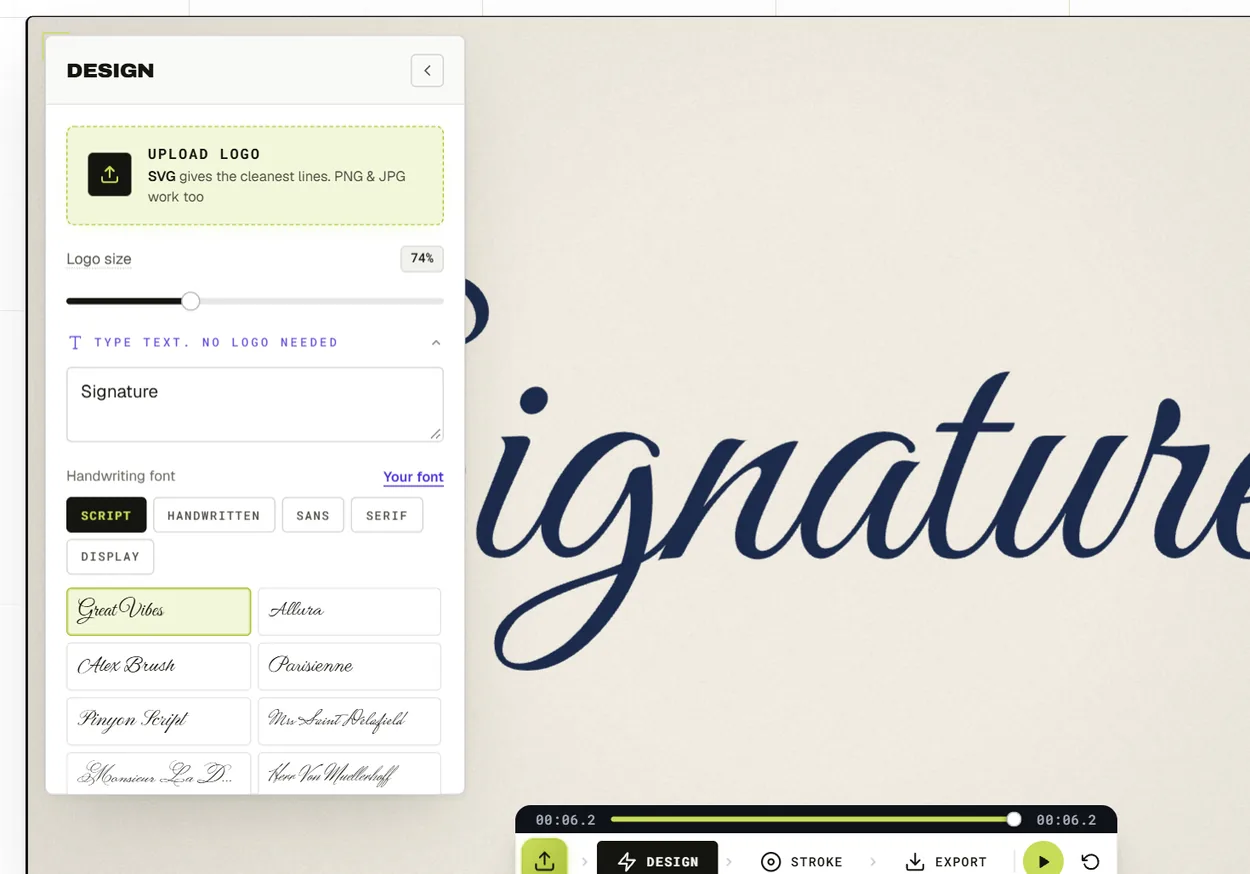
The Logo size slider under the upload card sets how big your logo sits in the frame. The pen grows and shrinks with it.
Step 2: Check the strokes
Open the Stroke panel on the right. While it's open, every path the tool found is drawn over the preview in its own colour, so you can see exactly how your logo will be written. The colours never show up in the video you export.
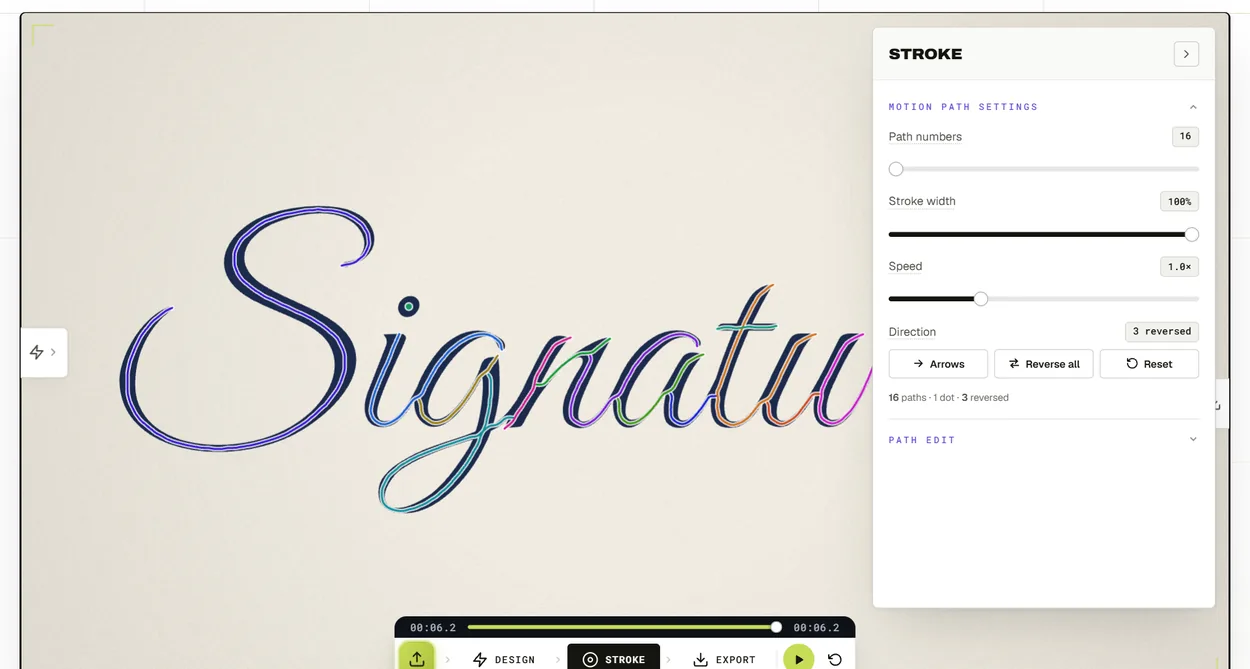
- Path numbers sets how many separate strokes the pen draws. Slide it up to split long strokes at their sharpest bends, or down to join strokes that meet end to end.
- Stroke width sets how much of the shape the pen fills around its path. At 100% the whole logo fills in, edges and corners included. Lower values give a thinner line, and it never spills outside your logo.
Step 3: Set the stroke order and direction
Real handwriting has an order: the capital first, then the rest of the word, then the dots and crosses. The tool puts strokes in writing order by itself, but you can change any of them.
Order. Turn on Path edit, click a stroke, then click its round number and pick a new one. If you take a number another stroke already has, that stroke goes blank until you number it, so nothing shuffles around behind your back.
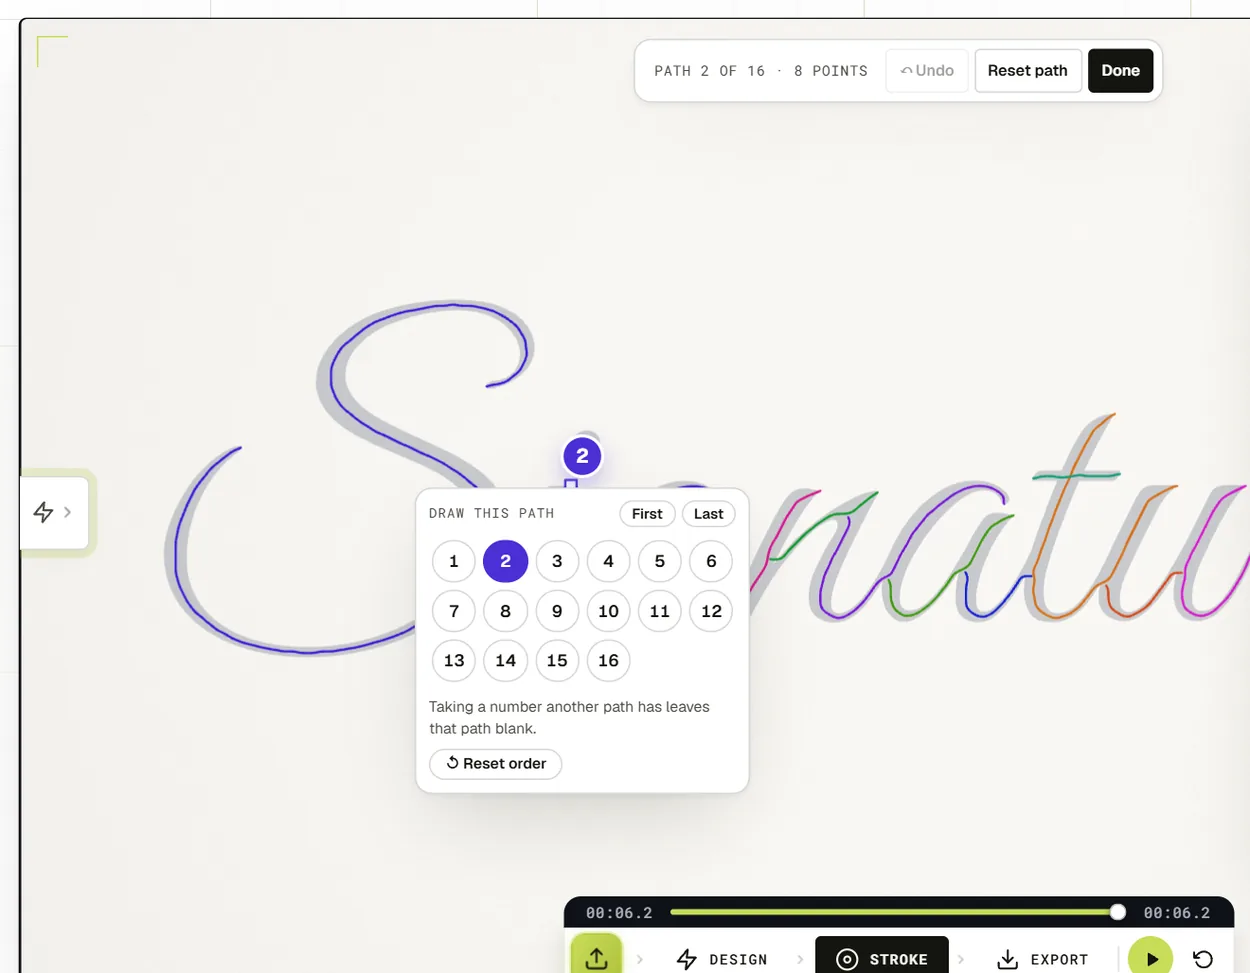
Direction. Click Arrows to put an arrow on every stroke, then click any arrow to reverse that stroke. Reverse all flips the lot, and Reset goes back to the automatic directions.
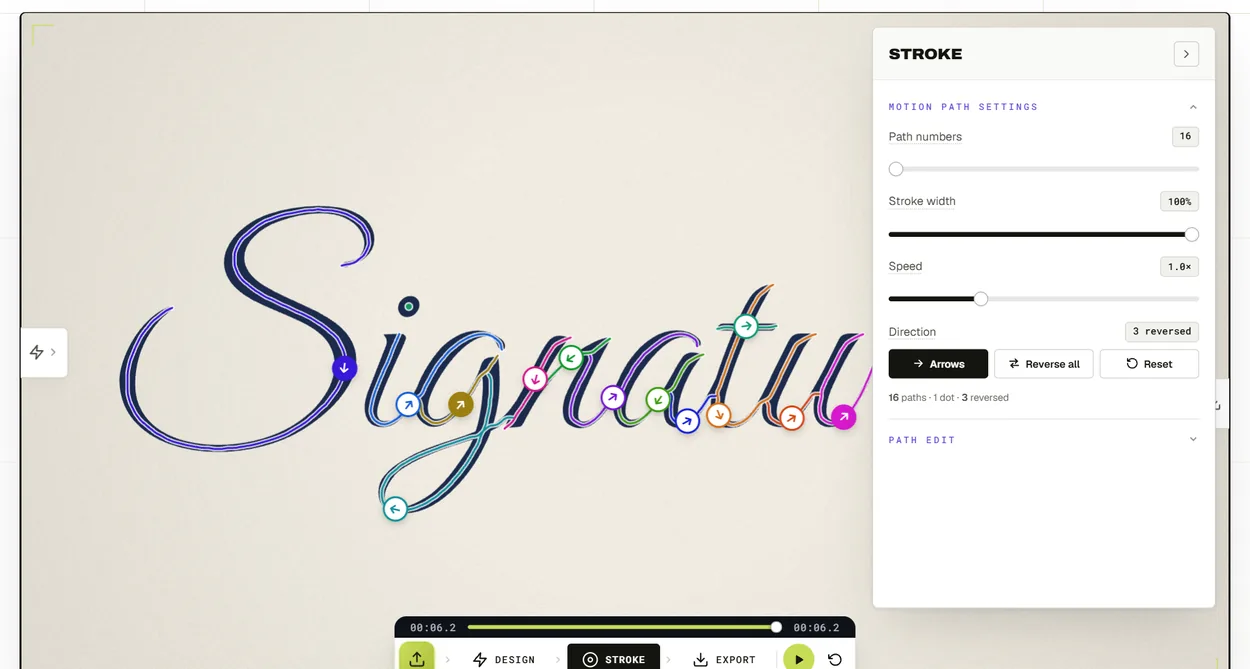
Path edit also works like the pen tool in Illustrator. Drag a point to move it, drag a handle to bend the curve, Ctrl-click a path to add a point and Alt-click a point to delete it. Ctrl+Z undoes.
Step 4: Choose the speed, the pen and the edge
Speed sits in the Stroke panel and runs from 0.2x to 3x. At 1x the pen writes for about four seconds. For a signature, 1x to 1.5x feels natural. For a GIF, a faster speed also means fewer frames and a smaller file.
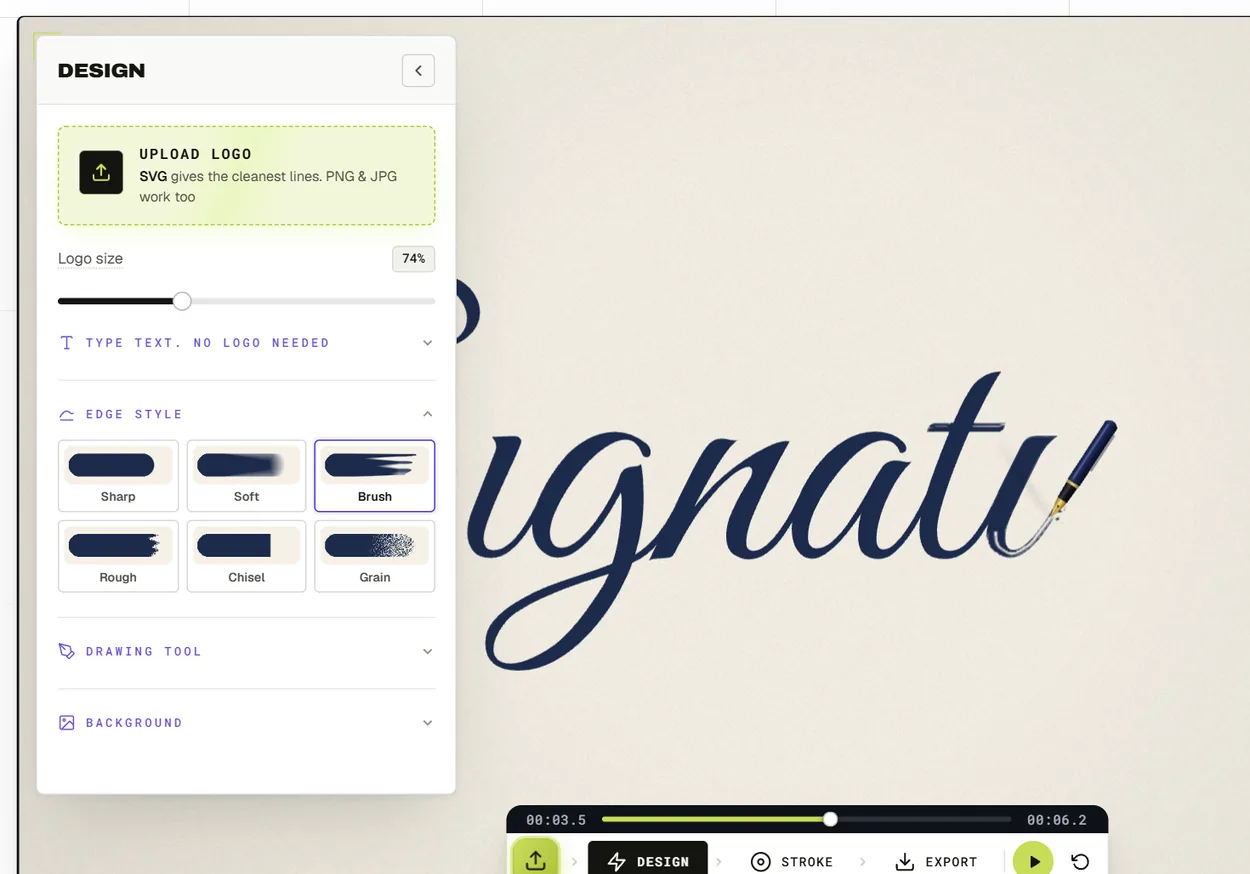
Back in the Design panel, Edge style changes how the ink looks while it's still wet: Sharp, Soft, Brush, Rough, Chisel or Grain. Each stroke dries to the clean shape of your logo once the pen has passed.
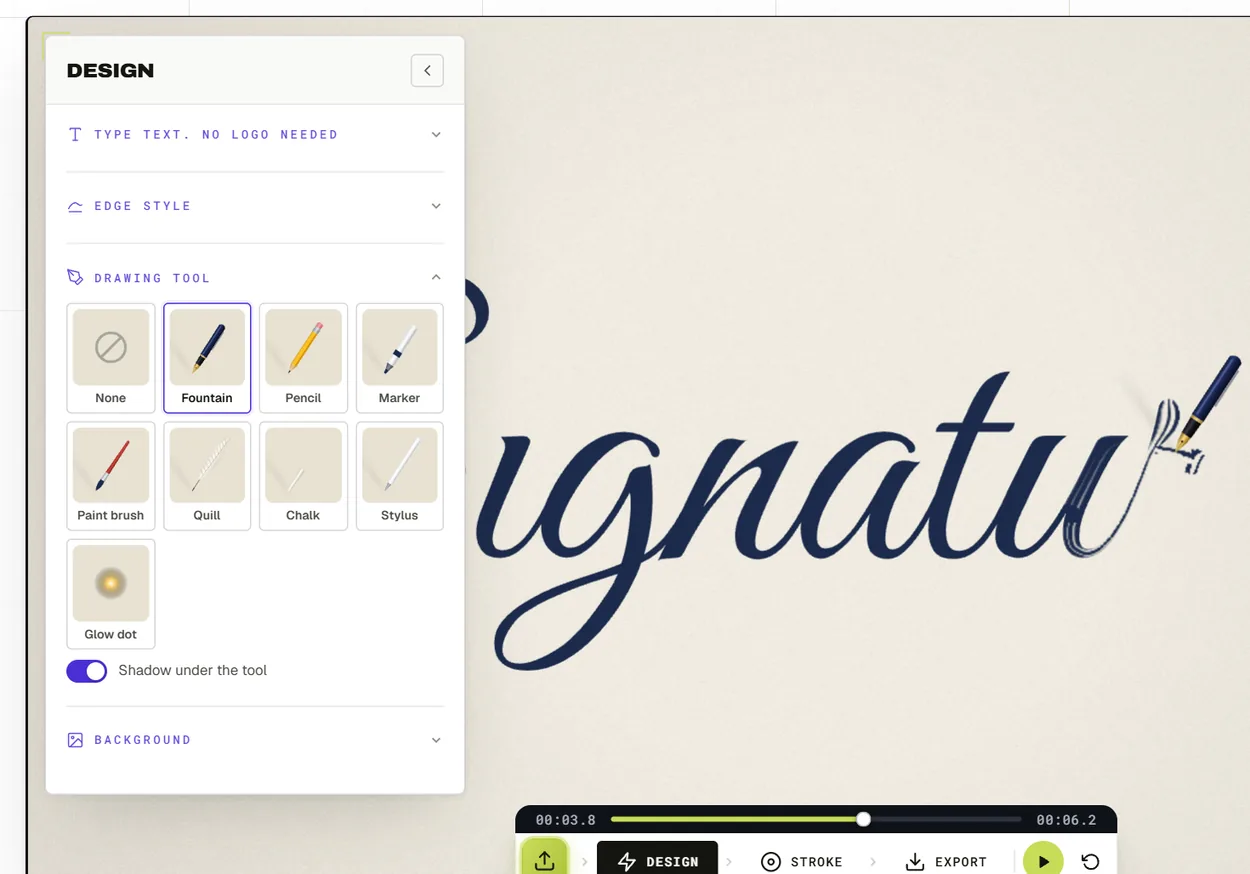
Drawing tool picks what writes the line: a fountain pen, pencil, marker, paint brush, quill, chalk, stylus or a glow dot. Choose None for a clean write-on with no pen at all. The shadow under the tool has its own switch.
Background, the last section of the Design panel, sets a colour, a gradient or your own picture behind the writing. On a dark background, dark ink switches to a warm white so it stays easy to read.
Step 5: Export your logo animation
Open the Export panel and pick the frame shape first, because it changes the preview too: 16:9 for YouTube, 9:16 for Reels and Shorts, 1:1 or 4:5 for feed posts. Then choose 1080p or 4K, 30 or 60 frames a second, and how many times it plays. If you'd rather have a GIF, pick 480, 640 or 960 px.
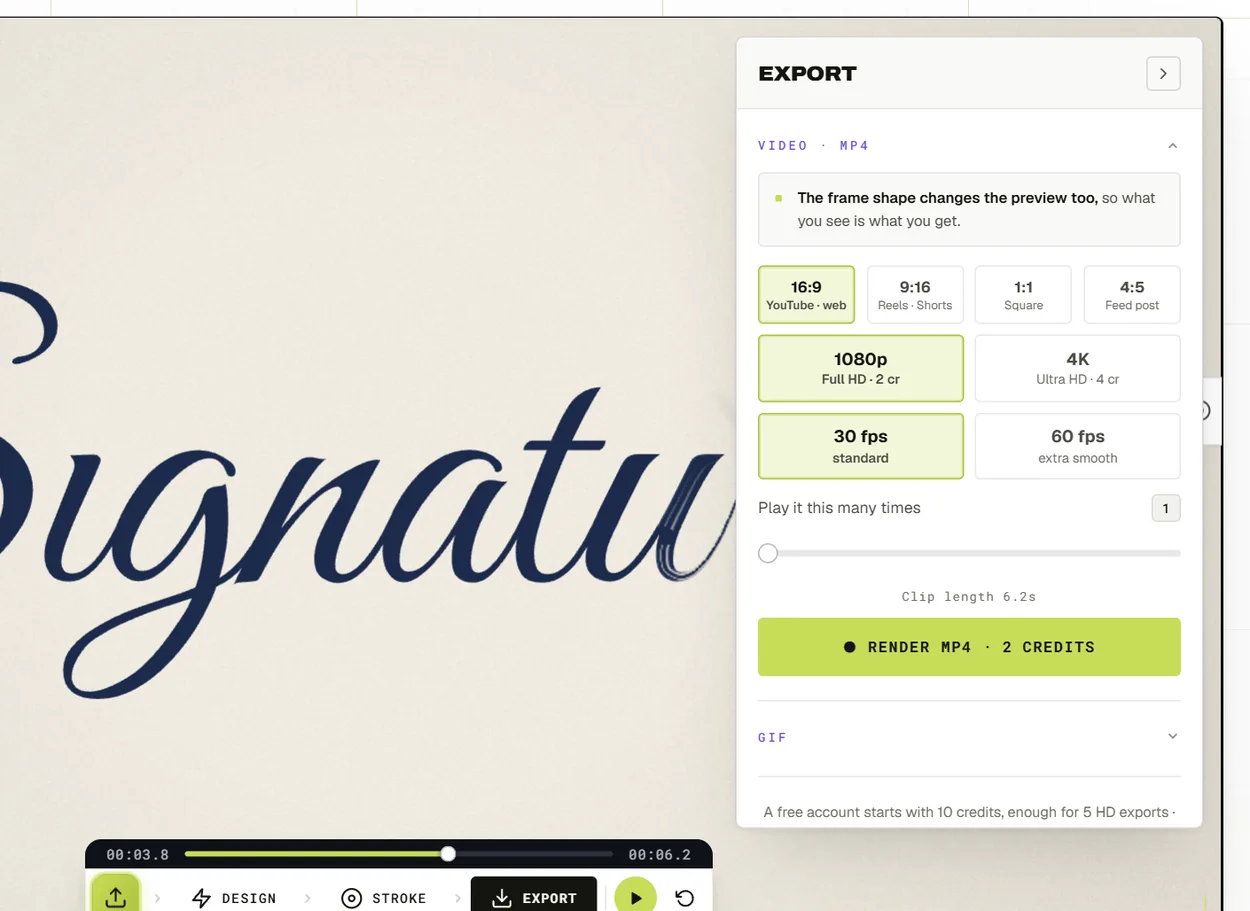
Uploading, every setting and the full preview are free with no account. Downloads use credits from a free account, and a new account starts with enough for its first few HD exports.
Tips for a handwritten logo animation that looks professional
- Start clean. A vector logo or a sharp, high-contrast photo gives smooth strokes. A blurry scan gives wobbly ones.
- Dot and cross last. People dot the i and cross the t after the word, so give those strokes the highest numbers.
- Don't rush it. Between 1x and 1.5x reads as confident handwriting. Much faster starts to look like a wipe.
- Let it hold. The finished logo stays on screen for a moment after the last stroke. That's the frame people remember.
- Match the frame to the platform. Vertical for Reels and Shorts, square for feeds, 16:9 for a YouTube intro.
When After Effects still makes more sense
If your animation needs several elements moving together, camera moves, 3D or custom sound design, After Effects or a motion designer is still the better route. Our studio makes custom logo animations for exactly that. For a clean handwritten reveal of a logo or a signature, the browser tool gets you there in a few minutes.
Frequently asked questions
Can I animate a logo that isn't handwritten?
Yes. Any logo works, because the tool follows the centre of each shape and fills the shape along it. Script and line logos look the most like handwriting. Bold block logos fill in stroke by stroke, a bit like a marker.
Is it free?
Trying it is free: uploading, every setting and the full preview need no account. Downloads use credits, a new account starts with enough for its first few HD exports, and no file has a watermark.
Can I use my own font?
Yes. Open Type text, click Your font and load a .ttf, .otf or .woff2 file.
Does my logo get uploaded anywhere?
No. Tracing, previewing and exporting all happen in your own browser, so your logo or signature never leaves your device.
Want to go deeper on signatures? Read our guide to signature logo animation, with examples and tips for animating a signature from a photo.